To see how this property works, we've created some sample sections to demonstrate how it can be used in your website.
1. The Creative way

Life Style
Long Weekend In Town

Life Style
More Reading More Fun

Life Style
Travel The World

Life Style
Reading Lifestyle
Life Style
NY Night Life
Life Style
Reading As A Hobby
Life Style
Explore The Wild
Life Style
Work From Home
2. Pricing Plans
BASIC
$49
5 Pages
500MB Storage
5 Photo Gallery
10MB Max file size
2 Custom domain
Automatic sitemap
10 Element Animation
30 Premium elements
10GB Bandwidth/month
ADVANCED
$99
5 Pages
500MB Storage
5 Photo Gallery
10MB Max file size
2 Custom domain
Automatic sitemap
10 Element Animation
30 Premium elements
10GB Bandwidth/month
PROFESSIONAL
$199
5 Pages
500MB Storage
5 Photo Gallery
10MB Max file size
2 Custom domain
Automatic sitemap
10 Element Animation
30 Premium elements
10GB Bandwidth/month
3. Documentations or Help Guides
Beginners Guide
Hello, and Welcome to Zoho Sites!
This beginner's guide will cover all of the necessary steps to create your first website. With our easy-to-use interface, creating a website has never been so simple.
By the time you reach the end of this guide, your site will be online and ready to go. Let's begin!
Getting Started
First, log in to Zoho Sites using your Zoho Account credentials. If you don't have an account with us, you'll need to create one.
To create an account:
- Go to sites.zoho.com.
- Enter an email address and password.
- Click Start Free Trial Now
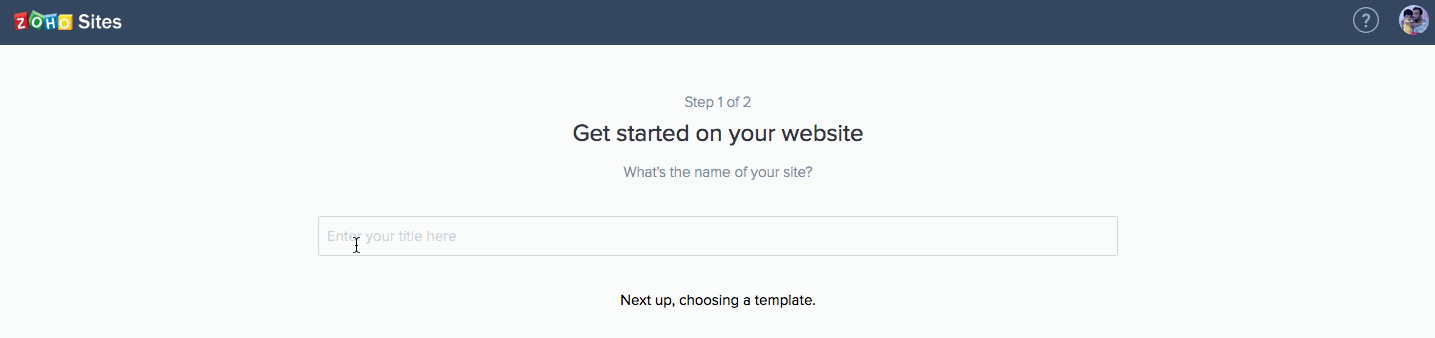
Creating Your Website
- Click Let's begin
- Enter the name of your website, then click Template Gallery.
- Hover over the template you want to use and click Choose.
Sections
Hover over the content area to access a particular section. Or click the content area and select a section from the dropdown list.
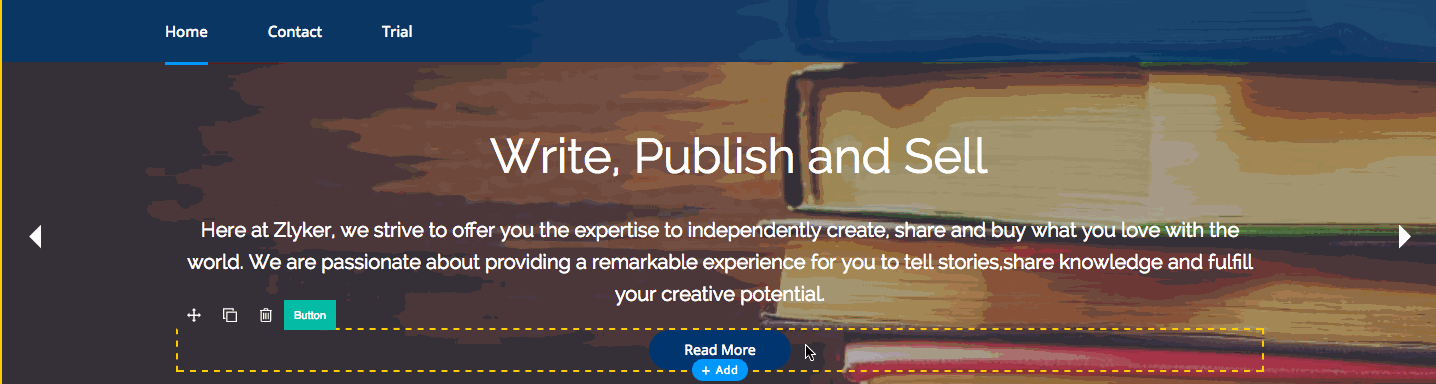
Note: Click the Add icon, then select +Element. Click Sections to access the sections content tray. From here, you can select and add sections with varying content layouts.
Adding Pages
- Click the Add icon at the top-left side of the builder, then click + Page.
- Enter a name and URL for your page.
- Click Add.

Note: Choose from the menu on the left to enable page settings like SEO, Menu options, Header and Footer Code, and Banner.
Preview
Publish
Note: You will need a domain name before your site goes live. An ideal domain name would be one which is specific to the nature of your website. If you do not have a domain already, you will need to configure one.
Post Publish Assistance
If you've followed all of the above instructions, your first website with us should be ready to go! However, if you ever find yourself in a fix, please don't hesitate to contact our 24/5 support team. Feel free to write to us at support@zohosites.com.
Now that you've created your site, you're ready to learn even more advanced tips. Next up, more info on customizing, collaborating, and configuring!
How It Works
The sticky property can be applied to the column and box elements. While scrolling, the element will remain fixed until it reaches its parent height. When the bottom of this element reaches its parent's maximum height, it will no longer appear fixed.
Ex1:Column element: The block with the green border that follows as you scroll is a column element. This content within the black border is its parent element. The column element has been made sticky, and its values are mentioned within. When you scroll, you will notice that the green box appears to be fixed until its base hits the base of the parent element.
Note :
- If both the element height and parent height are the same, it wont appear fixed.
- This feature can only be viewed on desktop devices of 992px or higher.
- The way this property works can only be viewed when you preview your site or publish it. This element cannot be tested on the builder.
- If you are placing sticky elements on top of each other, they may overlap. You can resolve this with the stack value feature.
- The element with the higher stack value will be on top. Set the stack values in descending order to avoid over lapping.
Enable Stickiness : True
Top Spacing : 20
Stack Value : 1
Ex2: Box element: The block with the green border is the box element. The block with the black border is its parent element. The box element has been made sticky, and its values are mentioned within. When you scroll, you will notice that the green box appears fixed until its base hits the base of the parent element.
Enable Stickiness : True
Top Spacing : 0
Stack Value : 1
Note :
- If both the element height and parent height are the same, it wont appear fixed.
- This feature can only be viewed on desktop devices of 992px or higher.
- The way this property works can only be viewed when you preview your site or publish it. This element cannot be tested on the builder.
- If you are placing sticky elements on top of each other, they may overlap. You can resolve this with the stack value feature.
- The element with the higher stack value will be on top. Set the stack values in descending order to avoid over lapping.